Imagine this: you’re cruising down a scenic road, the sun casting a golden glow on your leather car interior. Suddenly, your heart sinks as you notice a jagged tear in the driver’s seat. It’s an eyesore that tarnishes the elegance of your cherished vehicle. Don’t fret! With a little ingenuity and some simple materials, you can restore your leather seat to its former glory. Embrace the empowering journey of transforming your ripped leather car seat into a pristine masterpiece.

Image: www.dubizzle.com
Leather, a timeless material synonymous with luxury and comfort, can become susceptible to rips over time due to wear and tear. Whether it’s from accidental encounters with sharp objects or the relentless passage of time, a ripped leather car seat can diminish the aesthetic appeal of your vehicle. Fortunately, you don’t need to surrender to expensive upholstery replacements when faced with such mishaps. With a keen eye for detail and the right tools, you can effortlessly mend that ripped leather seat and restore it to its original splendor.
The Magic of Leather Repair: A Step-by-Step Guide
Step 1: Assess the Damage and Gather Your Arsenal
Begin by thoroughly examining the extent of the tear in your leather car seat. Determine whether it’s a superficial scratch, a partial tear, or a complete rip. Once you have a clear understanding of the damage, gather your leather repair kit. This kit should include leather cleaner, leather filler, leather patch, and a small brush.
Step 2: Cleanse and Prepare the Ripped Area
Before attempting to mend the tear, it’s crucial to cleanse the area thoroughly. Apply a small amount of leather cleaner to the surface of the tear and gently rub it in using a soft sponge or cloth. This step removes dirt, grime, and any other impurities that could interfere with the adhesive bond.
Step 3: Fill the Tear with Leather Filler
Now, it’s time to fill the tear with leather filler. Choose a filler that closely matches the color of your seat. Using the small brush provided in your repair kit, dab a generous amount of filler onto the damaged area. Smooth the filler evenly, ensuring it fully fills the tear.
Step 4: Reinforce the Repair with a Leather Patch
To reinforce the repair and prevent future tearing, apply a leather patch over the filled area. Cut the patch slightly larger than the tear. Apply a thin layer of adhesive to the underside of the patch and carefully align it over the repair. Press firmly and allow the adhesive to set completely.
Step 5: Restore the Leather’s Texture and Color
Once the patch is secured, you can focus on restoring the leather’s original texture and color. Apply leather dye or paint to the repaired area. Test the dye or paint on an inconspicuous part of the seat first to ensure color compatibility. Apply multiple thin layers, allowing each layer to dry before applying the next.
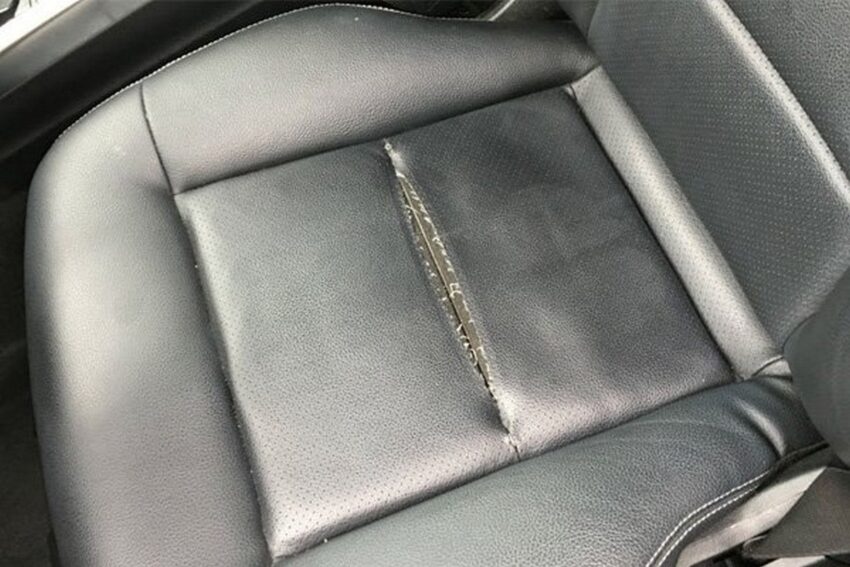
Image: libertypublicmarket.com
How To Fix Ripped Leather Car Seat
Embrace the Satisfaction of a Pristine Leather Interior
Step back and witness the transformation of your once-ripped leather car seat. With a little patience and a steady hand, you’ve successfully restored its pristine condition. Revel in the satisfaction of having mended your vehicle’s interior and saved yourself a hefty repair bill.
Remember, the key to a successful leather repair lies in meticulous attention to detail and using high-quality materials. By following the steps outlined above, you can restore the beauty and comfort of your leather car seat, making every journey a luxurious and memorable experience.

/GettyImages-1303637-two-way-mirror-57126b585f9b588cc2ed8a7b-5b8ef296c9e77c0050809a9a.jpg?w=740&resize=740,414&ssl=1 "Unveiling the Illusion – A Comprehensive Guide to Detecting Two-Way Mirrors")


