As winter’s icy grip tightens, maintaining a cozy and warm home becomes paramount. Often, this comfort hinges on the reliable functioning of your furnace. Imagine the dismay when your furnace fails to ignite, leaving you shivering in the cold. Don’t despair! With the right knowledge and a bit of troubleshooting, you can restore warmth to your home by manually lighting the furnace pilot light.

Image: electricity.freizeit-treffen.com
Igniting the pilot light can be a daunting task for those unfamiliar with furnaces, but it’s a skill worth mastering. By understanding the process and following the steps outlined below, you can save yourself the discomfort and expense of calling a repair technician. So, gather your tools, switch on your troubleshooting mindset, and let’s embark on a journey to illuminate your furnace’s pilot light, ensuring a toasty haven for you and your loved ones.
Anatomy of a Furnace Pilot Light
Before delving into the ignition process, it’s essential to familiarize yourself with the furnace’s key components. The heart of the furnace lies in the pilot light, a small flame that continuously burns to ignite the main burners when heat is required.
Locate the pilot light assembly, typically situated near the bottom of the furnace. You’ll notice a small metal tube with a tiny opening at the end, where the pilot light resides. A control knob рядом регулирует подачу газа к пилотному свету.
Step-by-Step Guide to Lighting the Furnace Pilot Light
With the necessary tools and safety precautions in place, it’s time to embark on the task of lighting the pilot light. Follow these steps meticulously, and soon you’ll be enjoying the comforting warmth of your furnace.
- Safety First: Turn off the gas supply to the furnace by switching the gas valve to the off position. This valve is usually located near the furnace or on the gas line. Wait at least five minutes for any gas to dissipate before proceeding.
- Locate the Pilot Light Assembly: Open the access panel on the furnace to expose the pilot light assembly. It’s typically located near the bottom of the furnace.
- Check the Thermocouple: Inspect the thermocouple, a small metal rod next to the pilot light. If it’s dirty, gently clean it with fine-grit sandpaper.
- Turn on the Gas Supply: Slowly turn the gas valve back to the “on” position. You should hear a hissing sound as gas flows into the pilot light assembly.
- Ignite the Pilot Light: Using a long lighter or a match, carefully ignite the gas coming out of the pilot light tube. Hold the flame near the opening until the pilot light ignites.
- Hold the Pilot Light Button: Press and hold the pilot light button for about 30-60 seconds after the pilot light has ignited. This allows the thermocouple to heat up and keep the gas valve open.
- Release the Pilot Light Button: Once the pilot light is stable, release the button. The pilot light should remain lit on its own.
- Adjust the Pilot Light Flame: Adjust the control knob to set the pilot light flame to the desired height. It should be around 1/2 to 1 inch in length.
- Turn on the Furnace: Switch the thermostat to the “heat” position and set the desired temperature. The furnace should start blowing warm air within a few minutes.
Troubleshooting Common Pilot Light Issues
Despite following the steps diligently, you may occasionally encounter difficulties igniting or maintaining the pilot light. Here are some common issues and their potential solutions:
- No Gas Flow: Ensure that the gas valve is fully open and that there are no blockages in the gas line.
- Dirty Thermocouple: A dirty thermocouple can prevent the pilot light from staying lit. Clean it with fine-grit sandpaper.
- Damaged Thermocouple: If cleaning the thermocouple doesn’t solve the issue, it may need to be replaced.
- Clogged Pilot Light Tube: Debris or spider webs can clog the pilot light tube, preventing the gas from reaching the pilot light. Use a small brush or pipe cleaner to clear any obstructions.
- Faulty Gas Valve: A faulty gas valve may not allow gas to flow to the pilot light. Contact a qualified technician for replacement.
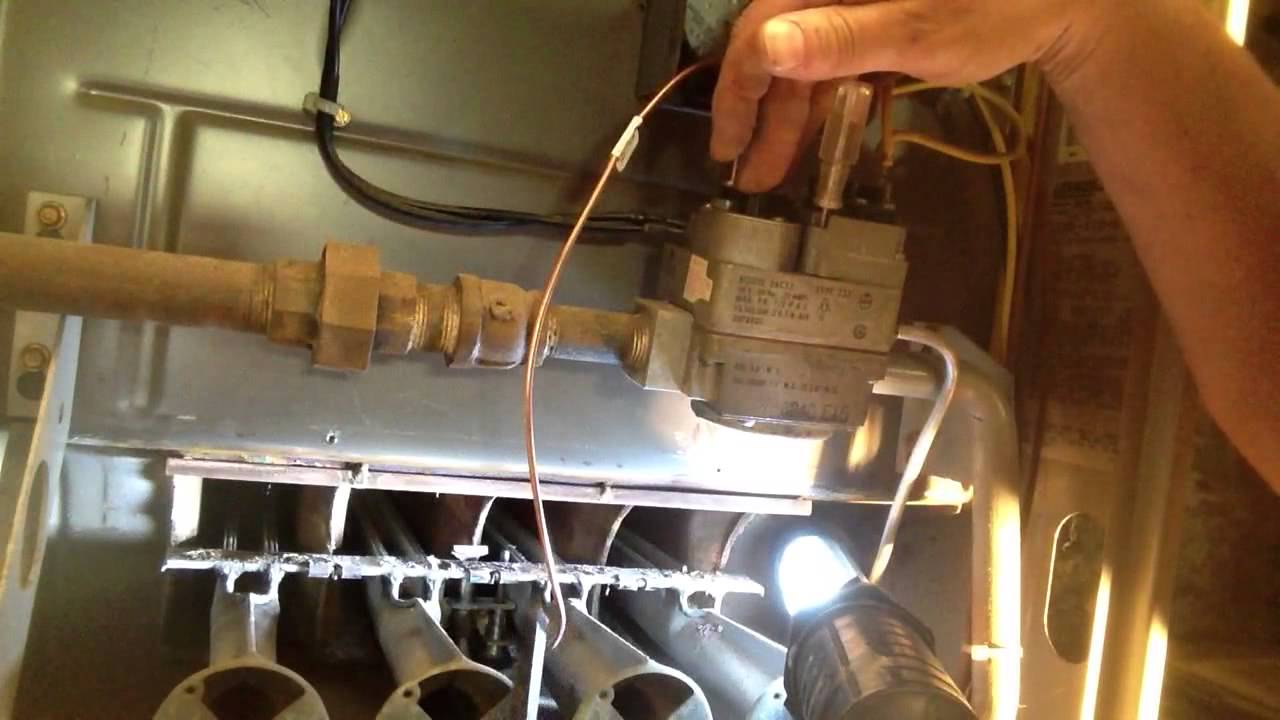
Image: homeminimalisite.com
How To Light The Furnace Pilot Light
Conclusion
Igniting the furnace pilot light is a valuable skill that can save you discomfort and inconvenience during the cold winter months. By following the simple steps outlined in this guide, you can restore warmth to your home and ensure a cozy haven for yourself and your loved ones.
Remember to prioritize safety by shutting off the gas supply before attempting to light the pilot light. If you encounter persistent problems or suspect a more significant issue, don’t hesitate to contact a qualified HVAC technician for assistance.
May your home always be filled with the warmth and comfort of a properly functioning furnace.

:max_bytes(150000):strip_icc()/142202371-5ab3dbf1ff1b78003633a0dd.jpeg?w=740&resize=740,414&ssl=1 "How to Set Up a Graco Pack ‘n Play – A Step-by-Step Guide")


