Introduction
Your water heater is an essential appliance in your home, providing you with hot water for bathing, washing dishes, and other household tasks. If you’re experiencing problems with your water heater, such as inconsistent water temperatures or a lack of hot water, it could be due to a faulty thermocouple. Testing the thermocouple is a simple and inexpensive way to determine if it’s the culprit behind your water heater woes. In this article, we’ll provide you with a comprehensive guide on how to test a water heater thermocouple, giving you the knowledge and confidence to tackle this plumbing issue on your own.

Image: waterheatertimer.org
What is a Thermocouple?
A thermocouple is a small but crucial component in your water heater’s gas control valve. It functions as a safety device, preventing gas leaks and potential explosions. The thermocouple generates a small electrical current when exposed to heat from the water heater’s flame. This current flows through a safety valve, keeping it open and allowing gas to flow to the burner. If the thermocouple fails or becomes faulty, the safety valve will close, shutting off the gas supply and preventing the water heater from operating.
Tools and Materials You’ll Need
Before you begin the testing process, gather the following tools and materials:
- Multimeter
- Needle-nose pliers
- Screwdriver
- Replacement thermocouple (if needed)
- Safety glasses
- Gloves
Step-by-Step Testing Procedure
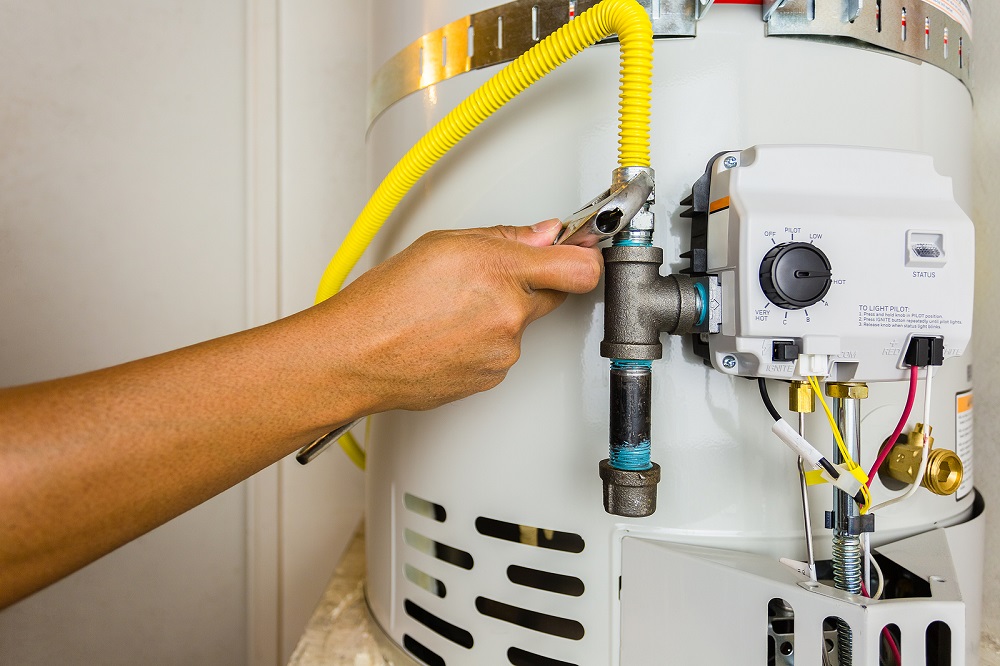
Image: www.epshawaii.com
Step 1: Safety First
Put on your safety glasses and gloves to protect yourself from potential electrical shocks or burns.
Step 2: Shut Off Gas and Power Supply
Turn off the gas supply to your water heater by locating the gas shut-off valve and turning it clockwise. Next, turn off the power supply to the water heater by flipping the circuit breaker or fuse.
Step 3: Disconnect the Thermocouple
Locate the thermocouple, usually attached to the gas control valve or burner assembly. Carefully disconnect the thermocouple wires from the terminals using your needle-nose pliers.
Step 4: Measure Thermocouple Voltage
Set your multimeter to the millivolt (mV) setting. Hold the positive (red) test lead against the positive thermocouple terminal and the negative (black) test lead against the negative thermocouple terminal. A properly functioning thermocouple should generate a voltage reading between 20 and 30 millivolts.
Step 5: Test Thermocouple Resistance
Turn your multimeter to the ohms (Ω) setting. Disconnect the thermocouple wires from the multimeter and place the test leads directly onto the thermocouple terminals. The resistance reading should be zero ohms for a functional thermocouple.
Step 6: Replace the Thermocouple
If both voltage and resistance tests fail, it’s likely that your thermocouple is faulty and needs to be replaced. Purchase a replacement thermocouple that is compatible with your water heater model. Remove the old thermocouple by unscrewing the pilot light assembly using a screwdriver and replacing it with the new one.
Step 7: Reset the Water Heater
Once the new thermocouple is in place, reconnect the thermocouple wires and turn on the gas supply and power supply. Allow a few minutes for the thermocouple to heat up and generate a signal. Reset the water heater by reigniting the pilot light or turning on the electric heating element.
Tips for Success
- Use a high-quality multimeter for accurate readings.
- Make sure to clean any corrosion or debris from the thermocouple terminals before testing.
- If you’re not comfortable performing electrical tests, it’s advisable to seek the assistance of a qualified plumber.
- Replace the thermocouple promptly if it fails the tests to ensure the safe operation of your water heater.
- Regular maintenance and periodic testing of the thermocouple can help prevent costly water heater repairs in the future.
How To Test A Water Heater Thermocouple
Conclusion
Testing a water heater thermocouple is a straightforward process that can help you diagnose and resolve common water heater issues. By following the steps outlined in this article, you can confidently determine if a faulty thermocouple is the cause of your water heater problems. If you encounter any difficulties or have concerns about the safety of the testing process, don’t hesitate to consult with a qualified plumber. Remember, a properly functioning thermocouple is essential for the safe and efficient operation of your water heater, ensuring a continuous supply of hot water in your home.


/GettyImages-1303637-two-way-mirror-57126b585f9b588cc2ed8a7b-5b8ef296c9e77c0050809a9a.jpg?w=740&resize=740,414&ssl=1 "Unveiling the Illusion – A Comprehensive Guide to Detecting Two-Way Mirrors")


