In this digital age, where music streaming services reign supreme, the allure of owning physical music collections may seem outdated. However, for those who appreciate the tangible joys of listening to their favorite tunes offline or in areas with limited internet access, downloading music to a USB remains a viable option. Whether you’re an ardent music enthusiast or simply want to create a customized playlist for your next road trip, follow these detailed steps to effortlessly download music to a USB.

Image: www.apowersoft.com
Prepare Your Arsenal
Format Your USB
Before embarking on your musical quest, ensure that your USB drive is properly formatted. This crucial step prepares your USB to effectively receive and store music files. Most USBs come pre-formatted with the FAT32 file system, which is widely compatible with various devices. You can verify this by connecting your USB to your computer and right-clicking on its icon in File Explorer (Windows) or Finder (Mac). Select “Properties” (Windows) or “Get Info” (Mac) to check its file system.
If your USB is not formatted in FAT32, you can easily reformat it using the following steps:
- Connect your USB to your computer.
- In File Explorer (Windows) or Finder (Mac), right-click on the USB icon and select “Format.”
- Under “File system,” select “FAT32” and click “Start.”
- Wait for the formatting process to complete.
Organize Your Digital Tunes
Once your USB is primed and ready, it’s time to gather your musical treasures. Whether you’ve meticulously curated playlists on Spotify or iTunes or have an extensive collection of MP3 files scattered across your computer, it’s essential to organize your music before transferring it to your USB. This organization will make it easier to navigate your music later on and prevent any unnecessary scrambling.
Create folders for different genres, artists, or playlists. For instance, you could have a folder for “Rock,” another for “Pop,” and a separate one for your “Workout Playlist.” This structure will streamline your music library and make it a breeze to find what you’re looking for.
Downloading Music to Your USB
Download Music Legally
Before we delve into the how-to’s, it’s imperative to emphasize the importance of obtaining music legally. Downloading copyrighted material without authorization is illegal and unethical. Support the artists you love and respect their work by purchasing music from reputable sources such as iTunes, Amazon Music, or Bandcamp.
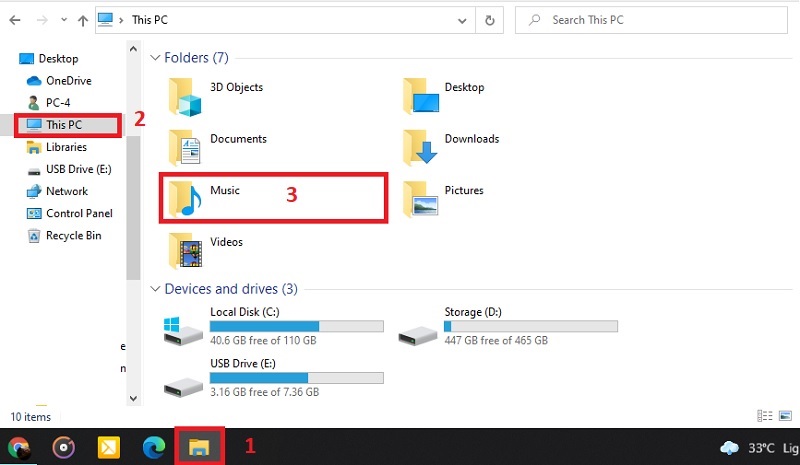
Image: www.acethinker.com
Transfer Music to Your USB
Now, let’s dive right into the practical process of transferring your carefully curated music to your USB. The steps may vary slightly depending on your operating system, but the general approach remains the same:
- Connect your USB to your computer.
- Open the folder containing the music files you want to transfer.
- Select the music files you want to transfer and drag and drop them onto the USB icon in File Explorer (Windows) or Finder (Mac).
- Wait for the transfer process to complete. The time it takes will depend on the number and size of the music files.
Enjoy Your Musical Journey
Unplug and Play
Once the music transfer is complete, safely eject your USB from your computer. You can now connect it to any compatible device, such as a car stereo, portable speaker, or media player, and revel in your personalized musical collection.
How Do I Download Music To A Usb
Tips from the Pros
- Use a USB with ample storage space: Music files can take up significant storage space, especially high-quality lossless audio formats. Ensure your USB has enough capacity to accommodate your entire music library.
- Create playlists for easy listening: Instead of transferring individual music files, consider creating playlists for different occasions or moods. It will make it easier to navigate and enjoy your music.
- Organize your music regularly: As your music library grows, it’s essential to maintain organization by regularly sorting and renaming files. This will save you time and frustration in the long run.
Frequently Asked Questions
- Q: Can I download music to a USB from streaming services like Spotify or Apple Music?
A: Unfortunately, no. Streaming services use DRM (Digital Rights Management) to prevent unauthorized downloads of copyrighted music. However, you can download music purchased from these platforms. - Q: What file formats are compatible with USB drives?
A: Most USB drives support common audio file formats such as MP3, WAV, AAC, and FLAC. However, some older USB drives may not support newer formats like FLAC. - Q: Can I transfer music from a USB to my phone or tablet?
A: Yes, you can transfer music from a USB to your phone or tablet using an appropriate adapter. However, some devices may have restrictions on music file formats or DRM protection.
Conclusion
Downloading music to a USB is a straightforward process that empowers you to enjoy your favorite tunes offline and on the go. By following the steps outlined in this comprehensive guide, you can seamlessly transfer your digital music collection to your USB drive and create a personalized audio experience that accompanies you wherever you venture.
Are you an avid music collector or simply someone who appreciates the convenience of tangible tunes? Share your thoughts and experiences in the comments below. Your insights and perspectives contribute to a vibrant online community of music lovers.


/GettyImages-1303637-two-way-mirror-57126b585f9b588cc2ed8a7b-5b8ef296c9e77c0050809a9a.jpg?w=740&resize=740,414&ssl=1 "Unveiling the Illusion – A Comprehensive Guide to Detecting Two-Way Mirrors")


