Unleash Your Music with iTunes: A Comprehensive Guide to Burning CDs with Ease

Image: www.tunesfun.com
Introduction
Imagine having your favorite songs at your fingertips, ready to accompany you on life’s adventures. Whether you’re driving to work or chilling at home, music has the power to transform any moment. Burning CDs from iTunes is an accessible and versatile way to bring your tunes to life, allowing you to share them with friends, family, or create a timeless playlist for yourself. This comprehensive guide will guide you through every step of the CD-burning process, ensuring you create high-quality discs that will preserve your musical memories for years to come.
Delving into the Realm of CD Burning
CD burning is the process of transferring digital music files from your computer to a physical CD. This allows you to play your music on any compatible CD player, car stereo, or even your laptop’s internal drive. iTunes, a widely used music player and library manager, provides an intuitive platform for burning CDs, making it accessible to music lovers of all levels.
Assembling Your Burning Arsenal
To embark on your CD-burning journey, you’ll need a few essential tools:
- A computer with iTunes installed
- Blank CDs (preferably of good quality)
- A CD burner (built-in or external)
Step-by-Step Guide to Burning a CD with iTunes
-
Gather Your Music: Begin by selecting the songs you wish to burn onto the CD. Drag and drop them into a new playlist in iTunes.
-
Insert the Blank CD: Insert a blank CD into your CD burner. iTunes will automatically detect the disc and a new window will appear.
-
Choose Burning Preferences: In the iTunes burning window, select the “Burn to Disc” tab. Here, you can adjust the burning speed, error correction settings, and disc format. For optimal performance, stick with the default settings.
-
Arrange the Playlist Order: Drag the songs in the playlist to organize them in the desired order they will be played on the CD.
-
Initiate the Burning Process: Click the “Burn” button located in the bottom-right corner of the iTunes window. iTunes will start writing the music files onto the CD.
-
Monitor the Progress: The progress bar will indicate the status of the burning process. It typically takes several minutes, depending on the number of songs you’re burning.
-
Eject and Label: Once the burning is complete, iTunes will prompt you to eject the CD. Label the disc with a title and tracklisting for easy identification.
Expert Tips for Optimal Performance
- Use high-quality blank CDs. Cheap or damaged discs can lead to playback issues.
- Ensure your CD burner is clean. Dust or debris can interfere with the writing process.
- Don’t overfill the CD. Aim to leave a little bit of space on the disc for future use.
- Consider using a CD-RW (ReWritable) disc if you think you may want to make changes to the playlist later on.
Conclusion
Congratulations! You have successfully burned a CD from iTunes. Be it for your own listening pleasure, gifting to loved ones, or preserving your musical treasures, you now have the knowledge to create and enjoy high-quality CDs. Explore iTunes’ advanced features to create playlists with fades, crossfades, and sound enhancements, enhancing your CD-burning adventures.
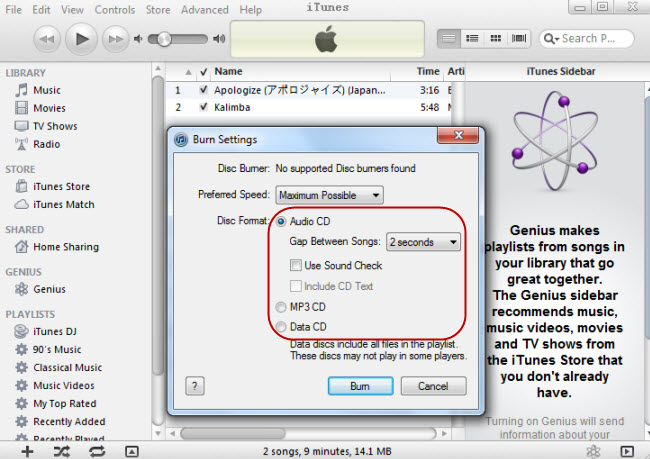
Image: www.apowersoft.com
How Can You Burn A Cd From Itunes


/GettyImages-1303637-two-way-mirror-57126b585f9b588cc2ed8a7b-5b8ef296c9e77c0050809a9a.jpg?w=740&resize=740,414&ssl=1 "Unveiling the Illusion – A Comprehensive Guide to Detecting Two-Way Mirrors")


