In today’s digital landscape, accessing work emails on the go has become a necessity. With the unparalleled convenience of smartphones, having access to your professional correspondence anytime, anywhere, is more critical than ever. If you own an iPhone, setting up your work email on your device is a seamless process, unlocking a world of productivity and seamless communication.
:max_bytes(150000):strip_icc()/add-another-email-iphone-5c32c5e646e0fb00017b1ba6.jpg "Unveiling the Effortless Guide to Adding Your Work Email to Your iPhone")
Image: nda.or.ug
Embarking on this journey, let us guide you through the simple steps to connect your work email to your iPhone. With our easy-to-follow instructions and expert insights, you will be effortlessly managing your work email right from the palm of your hand.
Navigating the iPhone Settings
Begin your endeavor by navigating to the “Settings” application on your iPhone. Within the myriad of options, locate and tap on the “Mail” tab. This is the gateway to configuring your email accounts on your device. Once inside the “Mail” settings, select the “Accounts” option, which unveils a comprehensive list of your existing email accounts.
Adding Your Work Email Account
Within the “Accounts” section, seek the “Add Account” option and tap on it. You will be presented with a myriad of email service providers. Choose the one that corresponds with your work email address. If your work email provider is not explicitly listed, select “Other” and manually enter the required information.
Providing Your Email Credentials
Subsequently, you will need to provide your work email address and password. Ensure that you input the correct credentials, as any errors will prevent successful account setup. Once you have meticulously entered your information, tap “Next.”
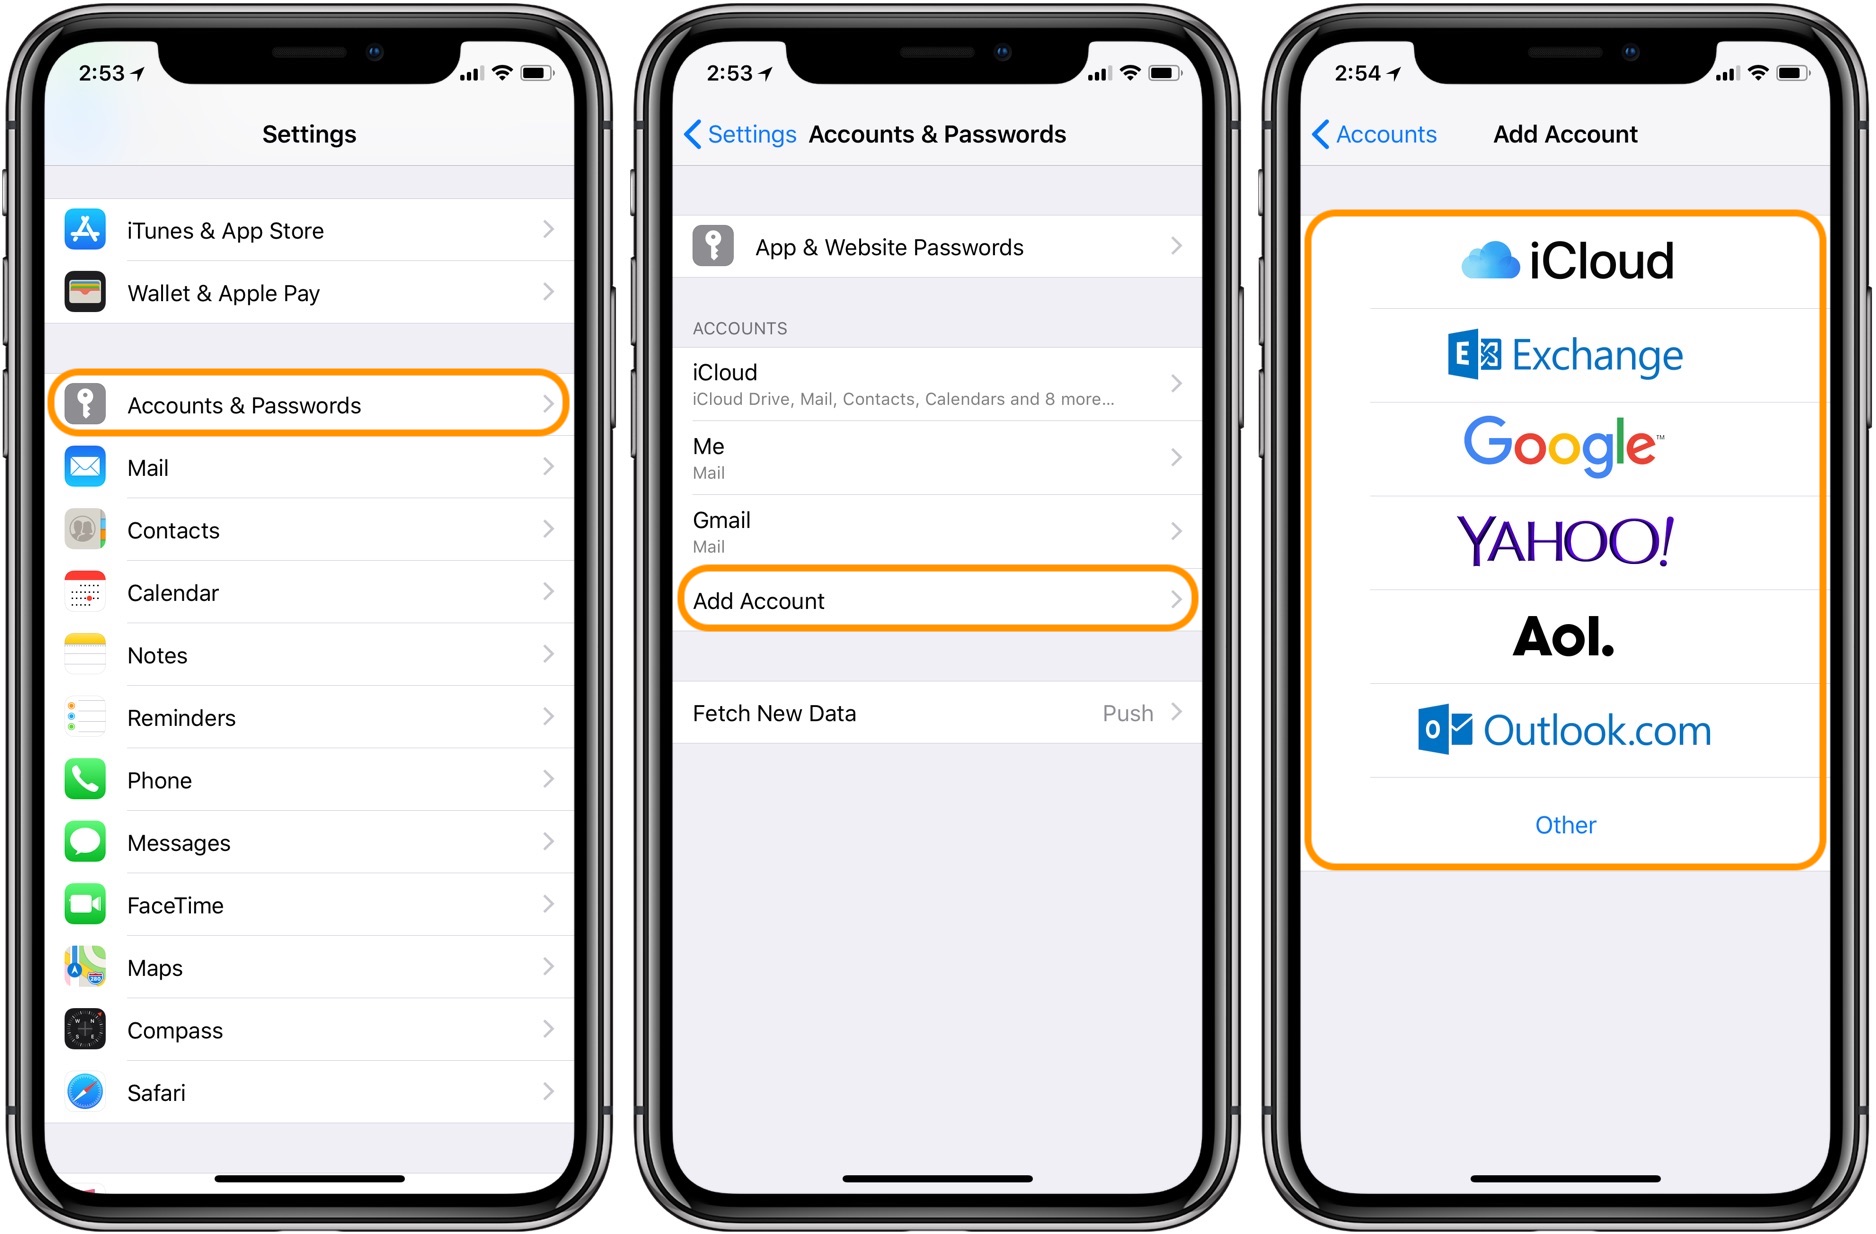
Image: 9to5mac.com
Selecting Your Email Options
Your iPhone will automatically configure the necessary settings for your work email account. However, you may encounter a scenario where manual adjustments are required. If prompted, customize your settings for incoming and outgoing mail servers, ensuring alignment with your work email provider’s specifications.
Activating Push Notifications
For real-time email updates, toggle on the “Push” option within the “Mail” settings. This feature ensures that you receive instant notifications whenever an email arrives in your work inbox. Stay connected and never miss an important update again.
Expert Insights for Seamless Synchronization
To enhance your email management experience, consider leveraging these expert tips:
- Facilitate quick access by adding your work email account to the “Favorites” section within the Mail app.
- Organize your emails efficiently by creating dedicated folders for various categories.
- Utilize the “Unified Inbox” feature to consolidate all your email accounts into a single, streamlined view.
How To Add Work Email To Iphone
Conclusion: Embracing Effortless Email Management
By following the steps outlined above, you have successfully integrated your work email into your iPhone. Reap the rewards of seamless communication and stay connected with your colleagues and clients, regardless of your location. Whether you’re commuting, traveling, or simply away from your desk, your work email is now at your fingertips.
To delve deeper into the intricacies of email management on your iPhone, explore the vast array of resources available online. Stay informed about the latest features and updates, ensuring that you’re always utilizing your device to its fullest potential. Embrace the power of having your work email readily accessible on your iPhone, and experience a whole new level of productivity and connectivity.


/GettyImages-1303637-two-way-mirror-57126b585f9b588cc2ed8a7b-5b8ef296c9e77c0050809a9a.jpg?w=740&resize=740,414&ssl=1 "Unveiling the Illusion – A Comprehensive Guide to Detecting Two-Way Mirrors")


